
As we batten down the hatches here in south east Queensland and wait for a cyclone to hit us, I got to thinking about the elusive 1/4″ seam, as you do when disaster’s imminent. An integral factor in achieving success in quilting, why is it so difficult to attain?
Sure there are some people who can ‘eyeball’ this width and zoom through seams with their machines set on warp speed, ending up with perfectly spaced sewing. Now these people probably have minimalist houses, all the clothes in their wardrobes actually fit them and they wouldn’t even know about the junk drawer with the dried-up super glue and Australia Day cake toppers – the ones you bought because they were 50% off just after Australia Day that might come in handy next year even though you’ve never yet made a cake for Australia Day and aren’t likely to in the future.
For those of us in the real world the 1/4″ seam seems to be a easy concept but is difficult to achieve. When I was learning to quilt I wondered if it was actually the ‘nirvana’ of quilting – something that all quilters aspired to and that, after many, many attempts at mortal sewing, may one day be achieved as you climbed the plane of competence – but something not possible for the beginners of the sewing world.
And don’t even start with the theory of the ‘scant 1/4″ seam’ or I’ll have to slap you.
Now I admit I do still have some issues with the perfect seam. On occasion I have come to the end of a seam, focused on the next step and zoomed through the last couple of inches at an acute angle as unlike the perfect seam as is possible. Being an impatient person I have sometimes left these imperfections in my work and feel that they serve two purposes – one I get to cross another project off the list and go on to the thrill of starting a new one; and secondly they become a lesson for the beginners of the group as to what will happen if they don’t do what I tell them and be very careful and precise with their sewing – a classic case of ‘do what I say not what I do’ syndrome.
Over the years I have seen many tips, tricks and products designed to help you with the 1/4″ goal. I suggest you give them all a go until you find what works. Here’s what I use:
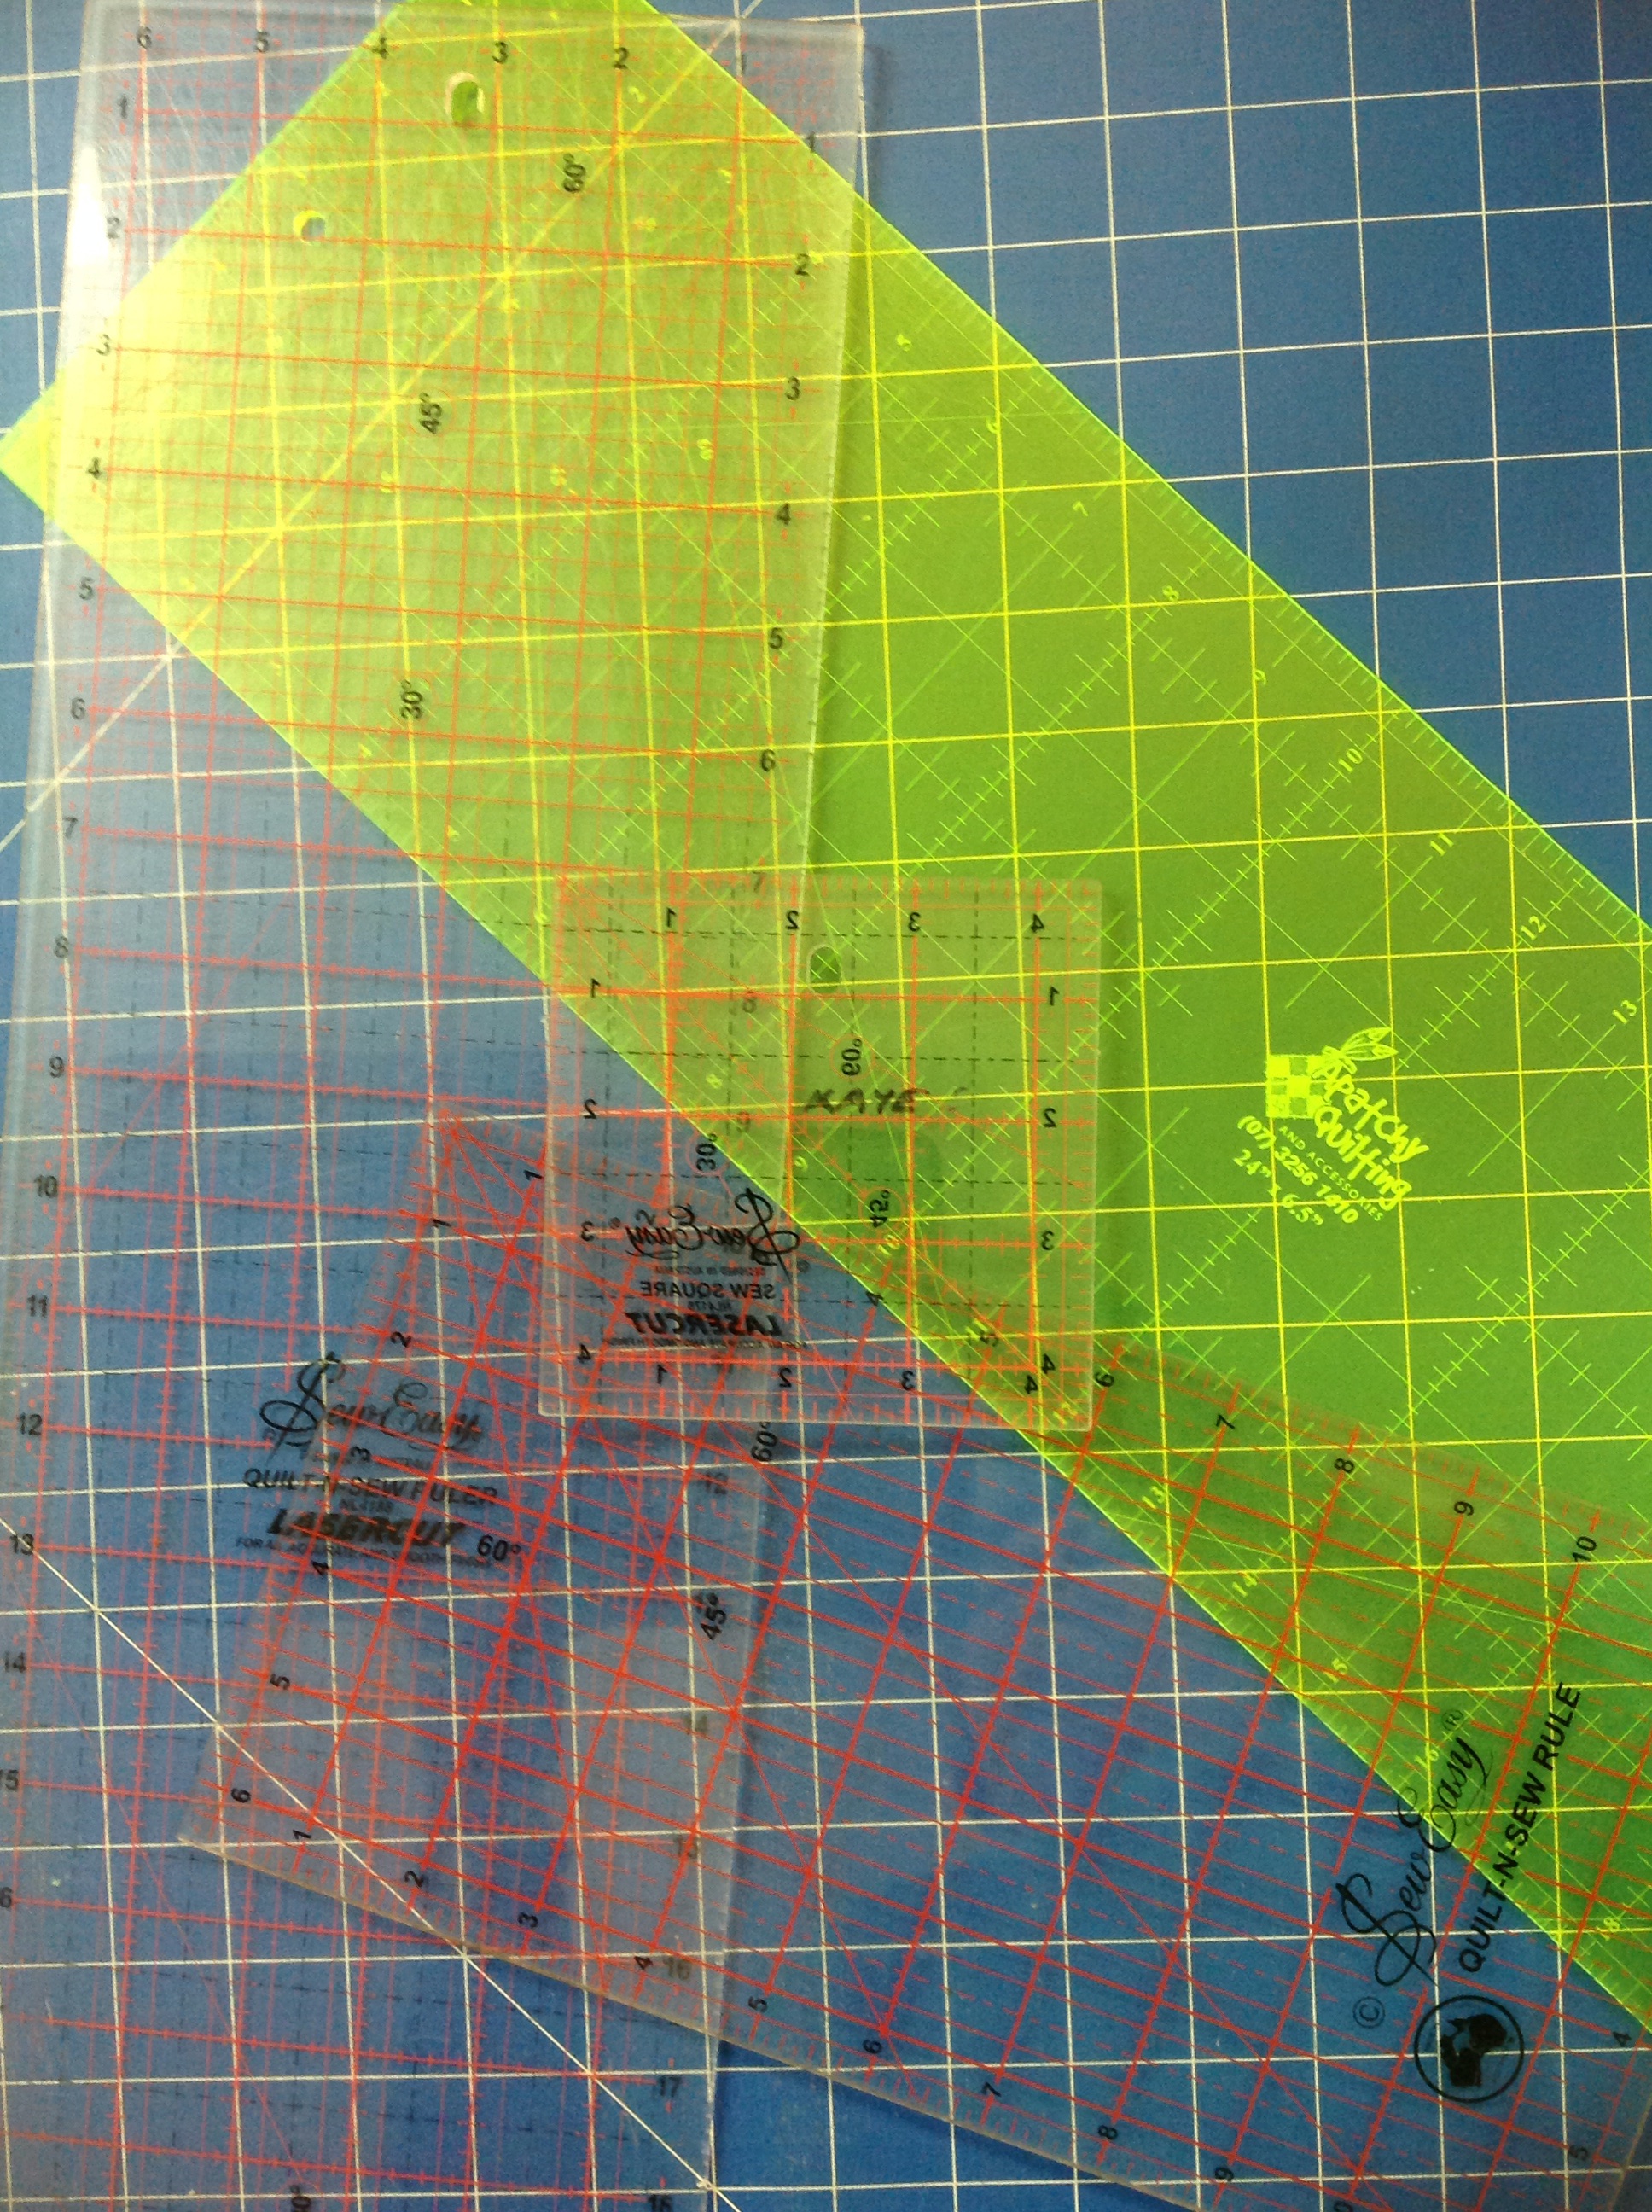
- There are lots of rulers out there. Make use of them. Just know that some of them try to mess with your mind because they aren’t as exact as you might think. If you can’t have them professionally calibrated by a team of engineers, then at least compare them to make sure you’re not starting off on the wrong foot.

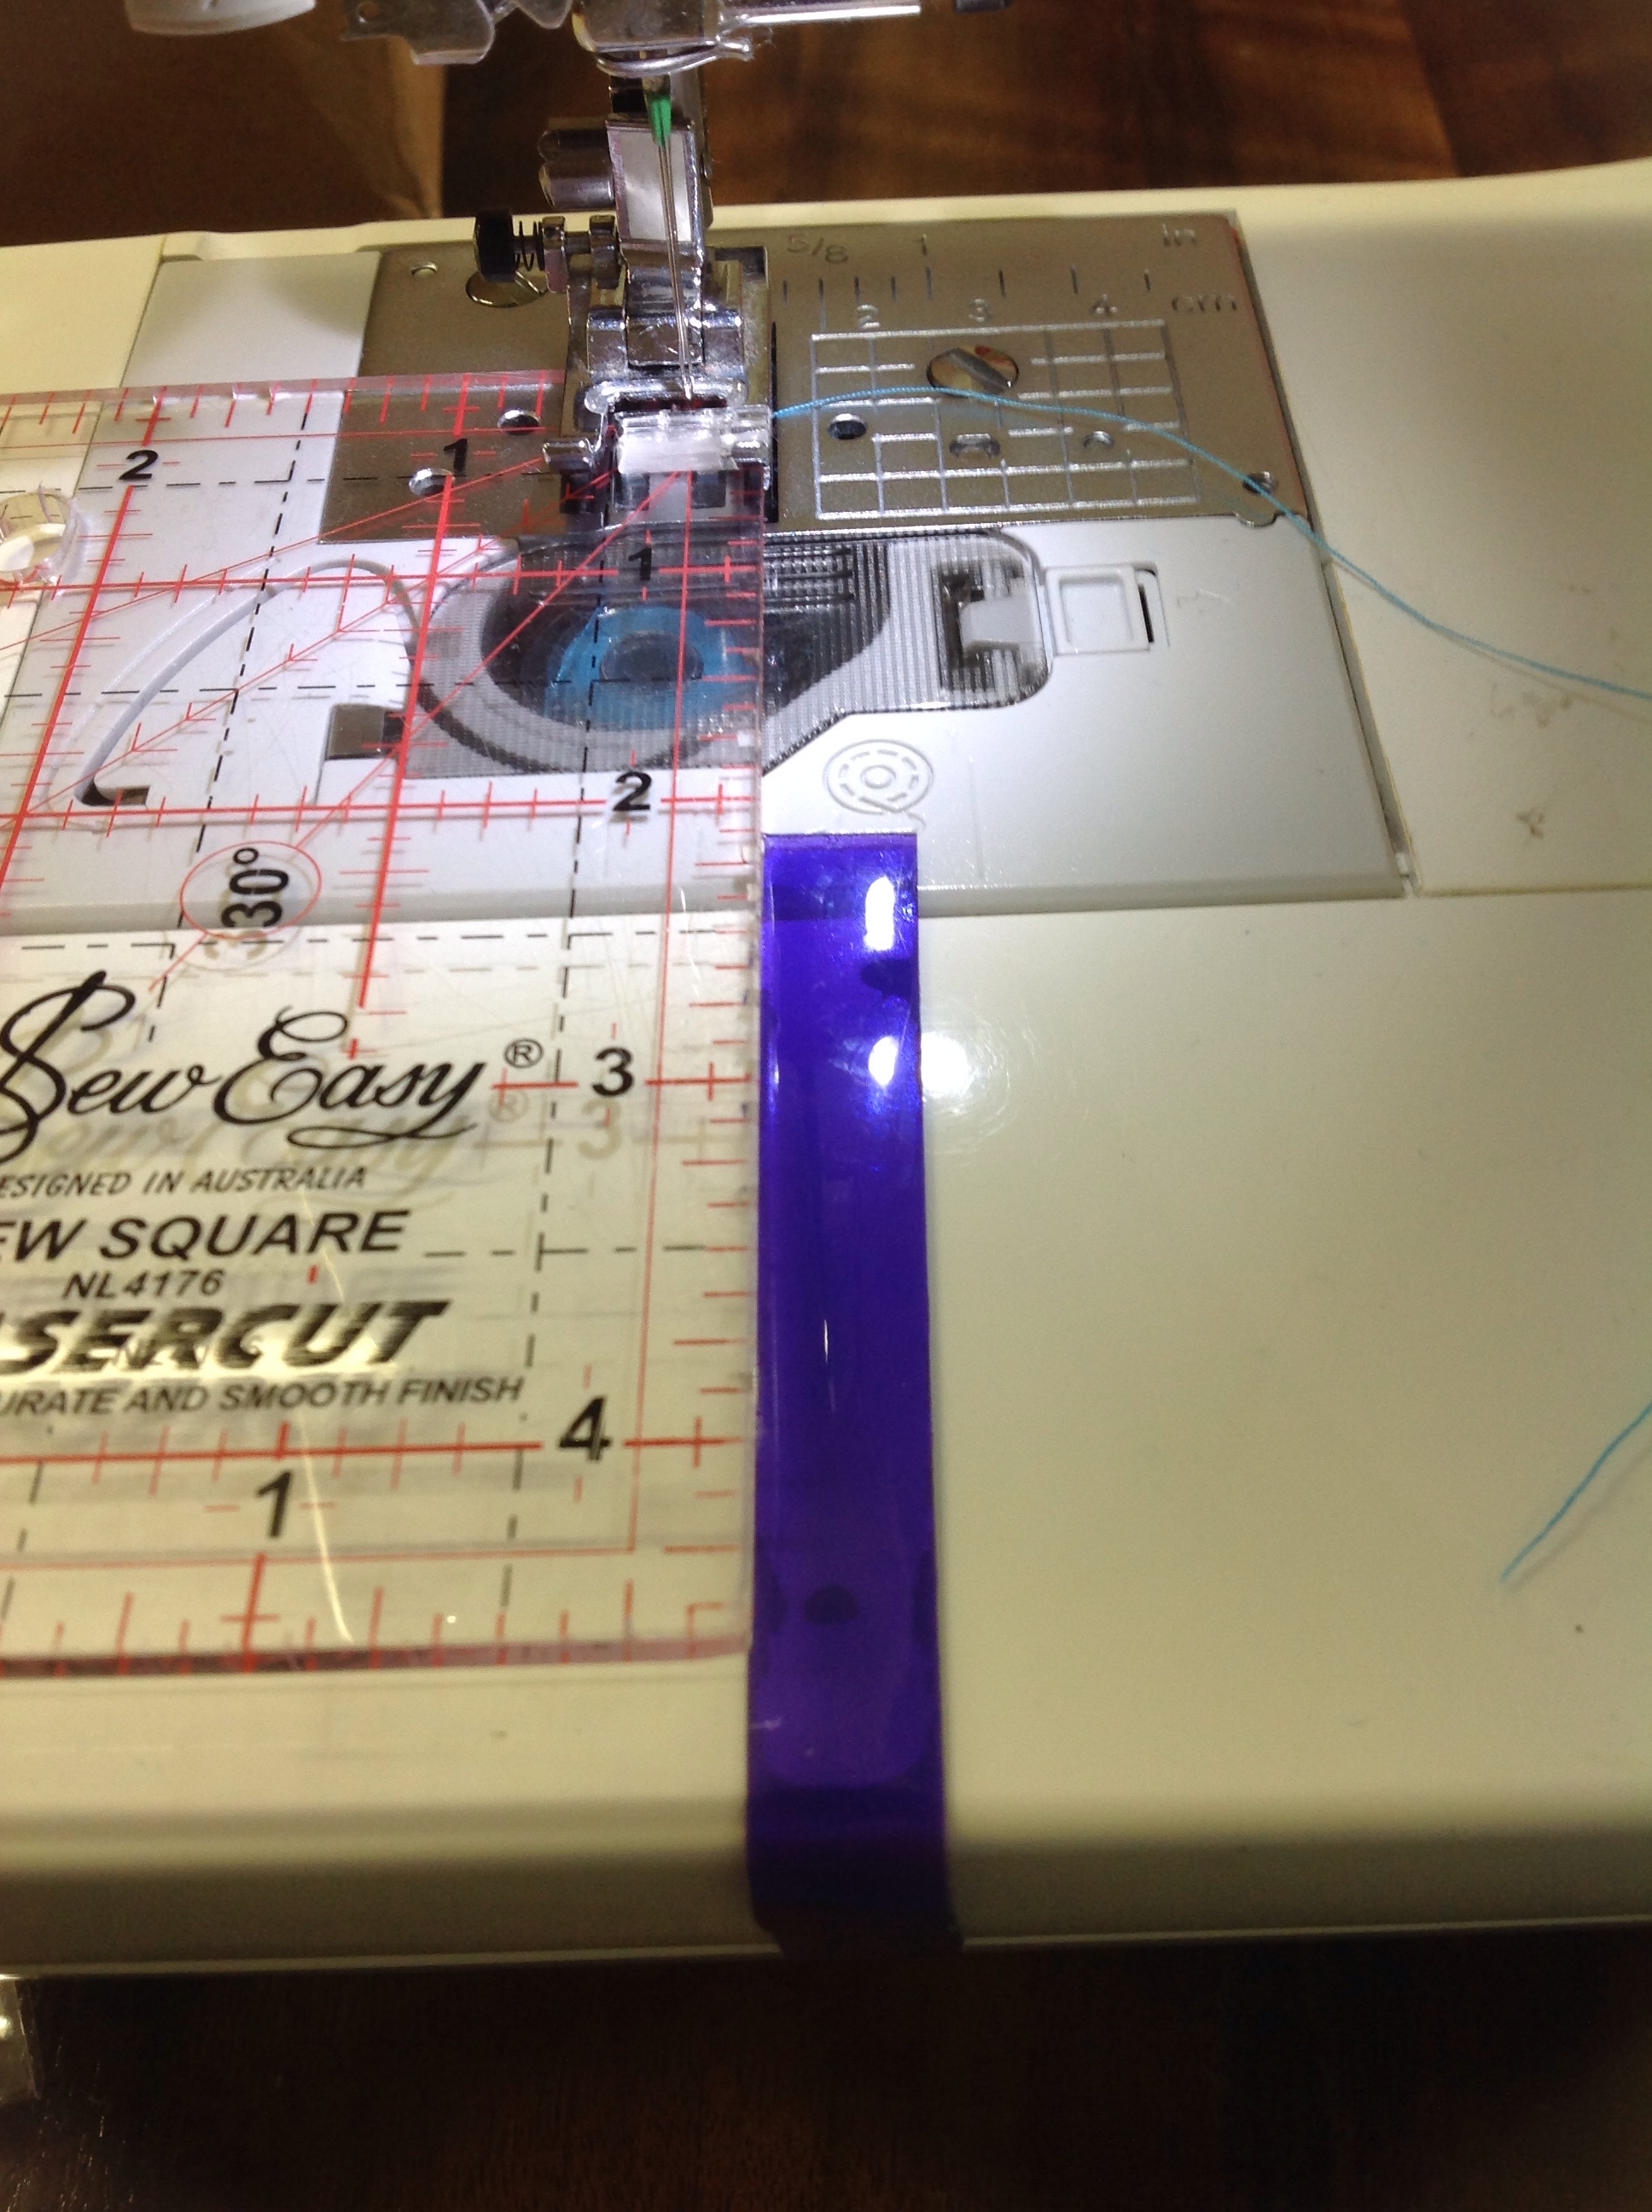
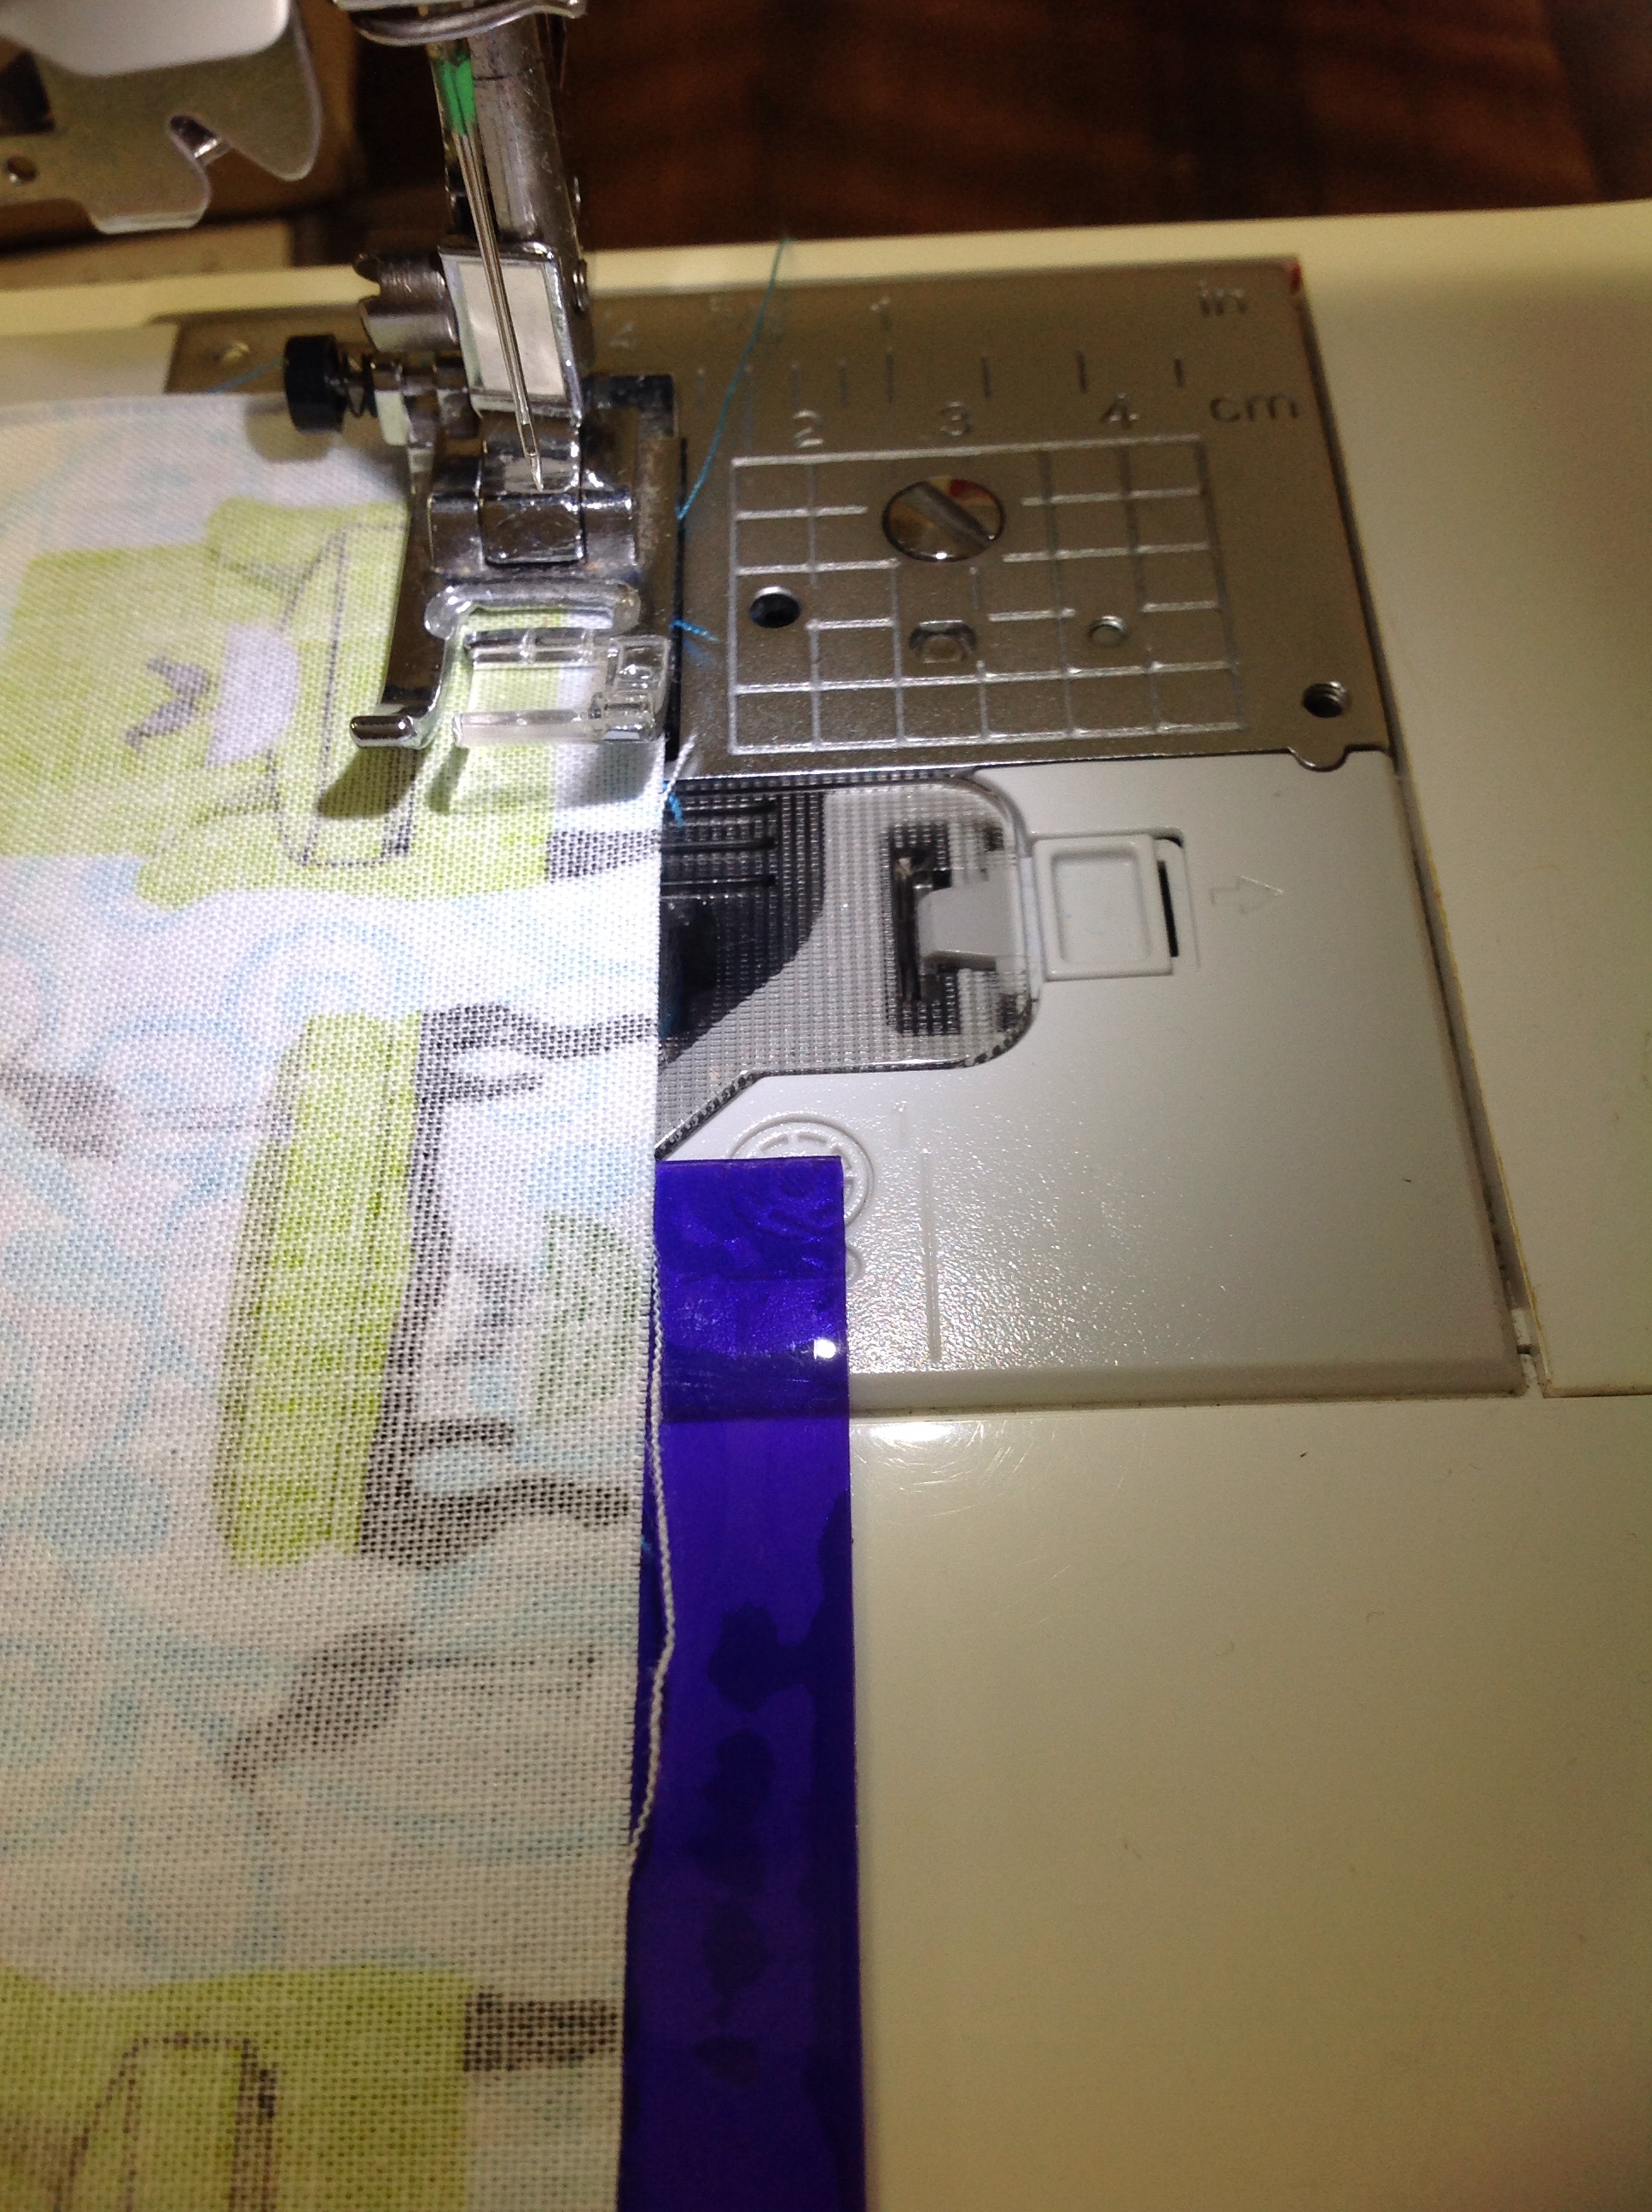
- My machine has a setting that gives you a 1/4″ seam guide. You set it and the width from the edge of the foot to the needle is 1/4″. What a clever little vegemite my Brucey is! Have a look at the instruction book that came with your machine and you could have the same setting. If not maybe you have a special foot that is designed to do the same thing.


- If you don’t find the setting or the foot and the instruction book has disappeared as well then don’t despair. Place a ruler on the bed of your machine and carefully turn the wheel until the needle is on the 1/4″ line. Then use some masking tape or painter’s tape or better still this product called Sewing Edge to mark a guideline for where to place your fabric. I like the Sewing Edge product because it is made of vinyl so it is thick enough to actually form a barrier past which you can’t push your fabric.


- The scant 1/4″ theory is that, when you press your seam to the side, the ensuing fold will take up some of the seam allowance. So you’re on a hiding to nothing as we say here. Not really, the amount is negligible (I would even say “scant”) so just make your 1/4″ inside the line not outside and when you press the seam all should be well.
- Speaking of pressing many’s the time when a bit of clever pressing can help with a seam that’s a LITTLE out.
- The absolute sure way to attain perfect piecing is to MEASURE after EACH seam to make sure that your piece measures what it should. Then join the next piece and measure again before you continue. I make my beginners do this, not because I enjoy their tortured grimaces but because it actually works. Try it for one project. It will change your life and you might be able to retire your seam ripper – or at least put it in the junk drawer.


Tell me your secrets for perfecting the 1/4″ then have a look at this:
The Apatcheez were very clever this week. We even had three beginners – Apatchy is single-handedly trying to populate the world with quilters – what a thought, get your lighters out and sway from side to side….


Until next time
Happy Quilting
Kaye

Kaye, Ah that 1/4″ seam. Life changed when I had to buy a new machine and it came with the gift of a foot with 1/4″ guide that keeps the fabric lined up. I have just recently put together a quilt of 2 1/2″ sq triangles and this wonderful foot made it sooooo easy.
I enjoy your emails, thanks … and keep them coming cheers Val Bunter
Sounds wonderful. Don’t forget to email me a photo and we’ll put it on the gallery.
Thanks for the positive feedback.
Kaye