
Before I divulge the secret of the best gadget in your quilting toolbox have a look at this:

The prolific Jan has already finished one of the Hexie Club projects (that she only started last week). Oh the joys of having unlimited sewing time. Jan tweaked the pattern slightly and added a fancy zipper pull. So it’s really a one-off.
There are more Hexie Club projects out there and we’ll bring you photos as soon as they’re finished. I’ll also talk to you more about hexagons and how they’re taking over the Apatcheez but now I have to tell you about the super-tool:
So this week we had some people working on their first sampler quilt. I mentioned it in the last post that some reverse sewing was required when Emma and Sharon’s blocks just wouldn’t come together as they should.

Third time lucky Emma!
We always tell learners that they don’t have to worry about making a mistake, that we all did (and do) and that “it’s only fabric and what’s the worst thing that can happen?” The lovely thing about quilting is that you can always go back and fix a mistake or else make a new block if the one you’re working on is beyond repair.
Of course there is frustration in failing to sew the perfect 1/4″ seam, or from sewing two pieces together the wrong way round and sometimes you feel like Sisyphus – endlessly trying to create the perfect piece. (Note – at this point I asked the teenager-in-residence to name an amazingly creative person and he came up with Eddie Van Halen so the following example is his fault). But did Eddie Van Halen enjoy practising his chords until he got it right? Probably not. Sometimes things don’t go well and you want to give up – but wait – here is an wonderful tool to help – the seam ripper!
When seams do have to be unpicked the best quilting tool you’ll own comes into its own – the seam ripper. Sure you could use scissors or a needle or a stanley knife or some other sharp weapon but you’ll end up with a mess. Either you’ll pull the fabric out of shape or fray it to such an extent that it is unusable.

Don’t think that the humble seam ripper can be used willy-nilly – oh no – in untrained hands it will cause more damage than it fixes. If you actually try to position the seam ripper between the seams and rip it along you’ll find you may have unravelled more than you bargained for – and that block you just spent all morning sewing is now – well – ripped!
My first suggestion would be that you buy yourself an ultra sharp good quality seam ripper. I would recommend Clover brand. They have two types – the brown handle and white handle models – and both are excellent. Cheap rippers will only end in tears – just saying…


So it just happens that I had cause to do some reverse sewing myself this weekend when I inadvertently sewed two triangles to the bottom left and top right of a piece rather than top left and bottom right. As the piece forms part of a flower bud leaving it was not an option (although I did consider it for a day or so).

So it had to go. Actually several had to go because I had continued on before I realised the extent of the mistake. Here’s the way to do it:

Slip the sharp end of the seam ripper through a stitch and press forward to break the stitch. I only needed to undo that part of the seam from the point of the seam ripper to the far right (not the whole seam) which is why the seam ripper is in the middle of the fabric.
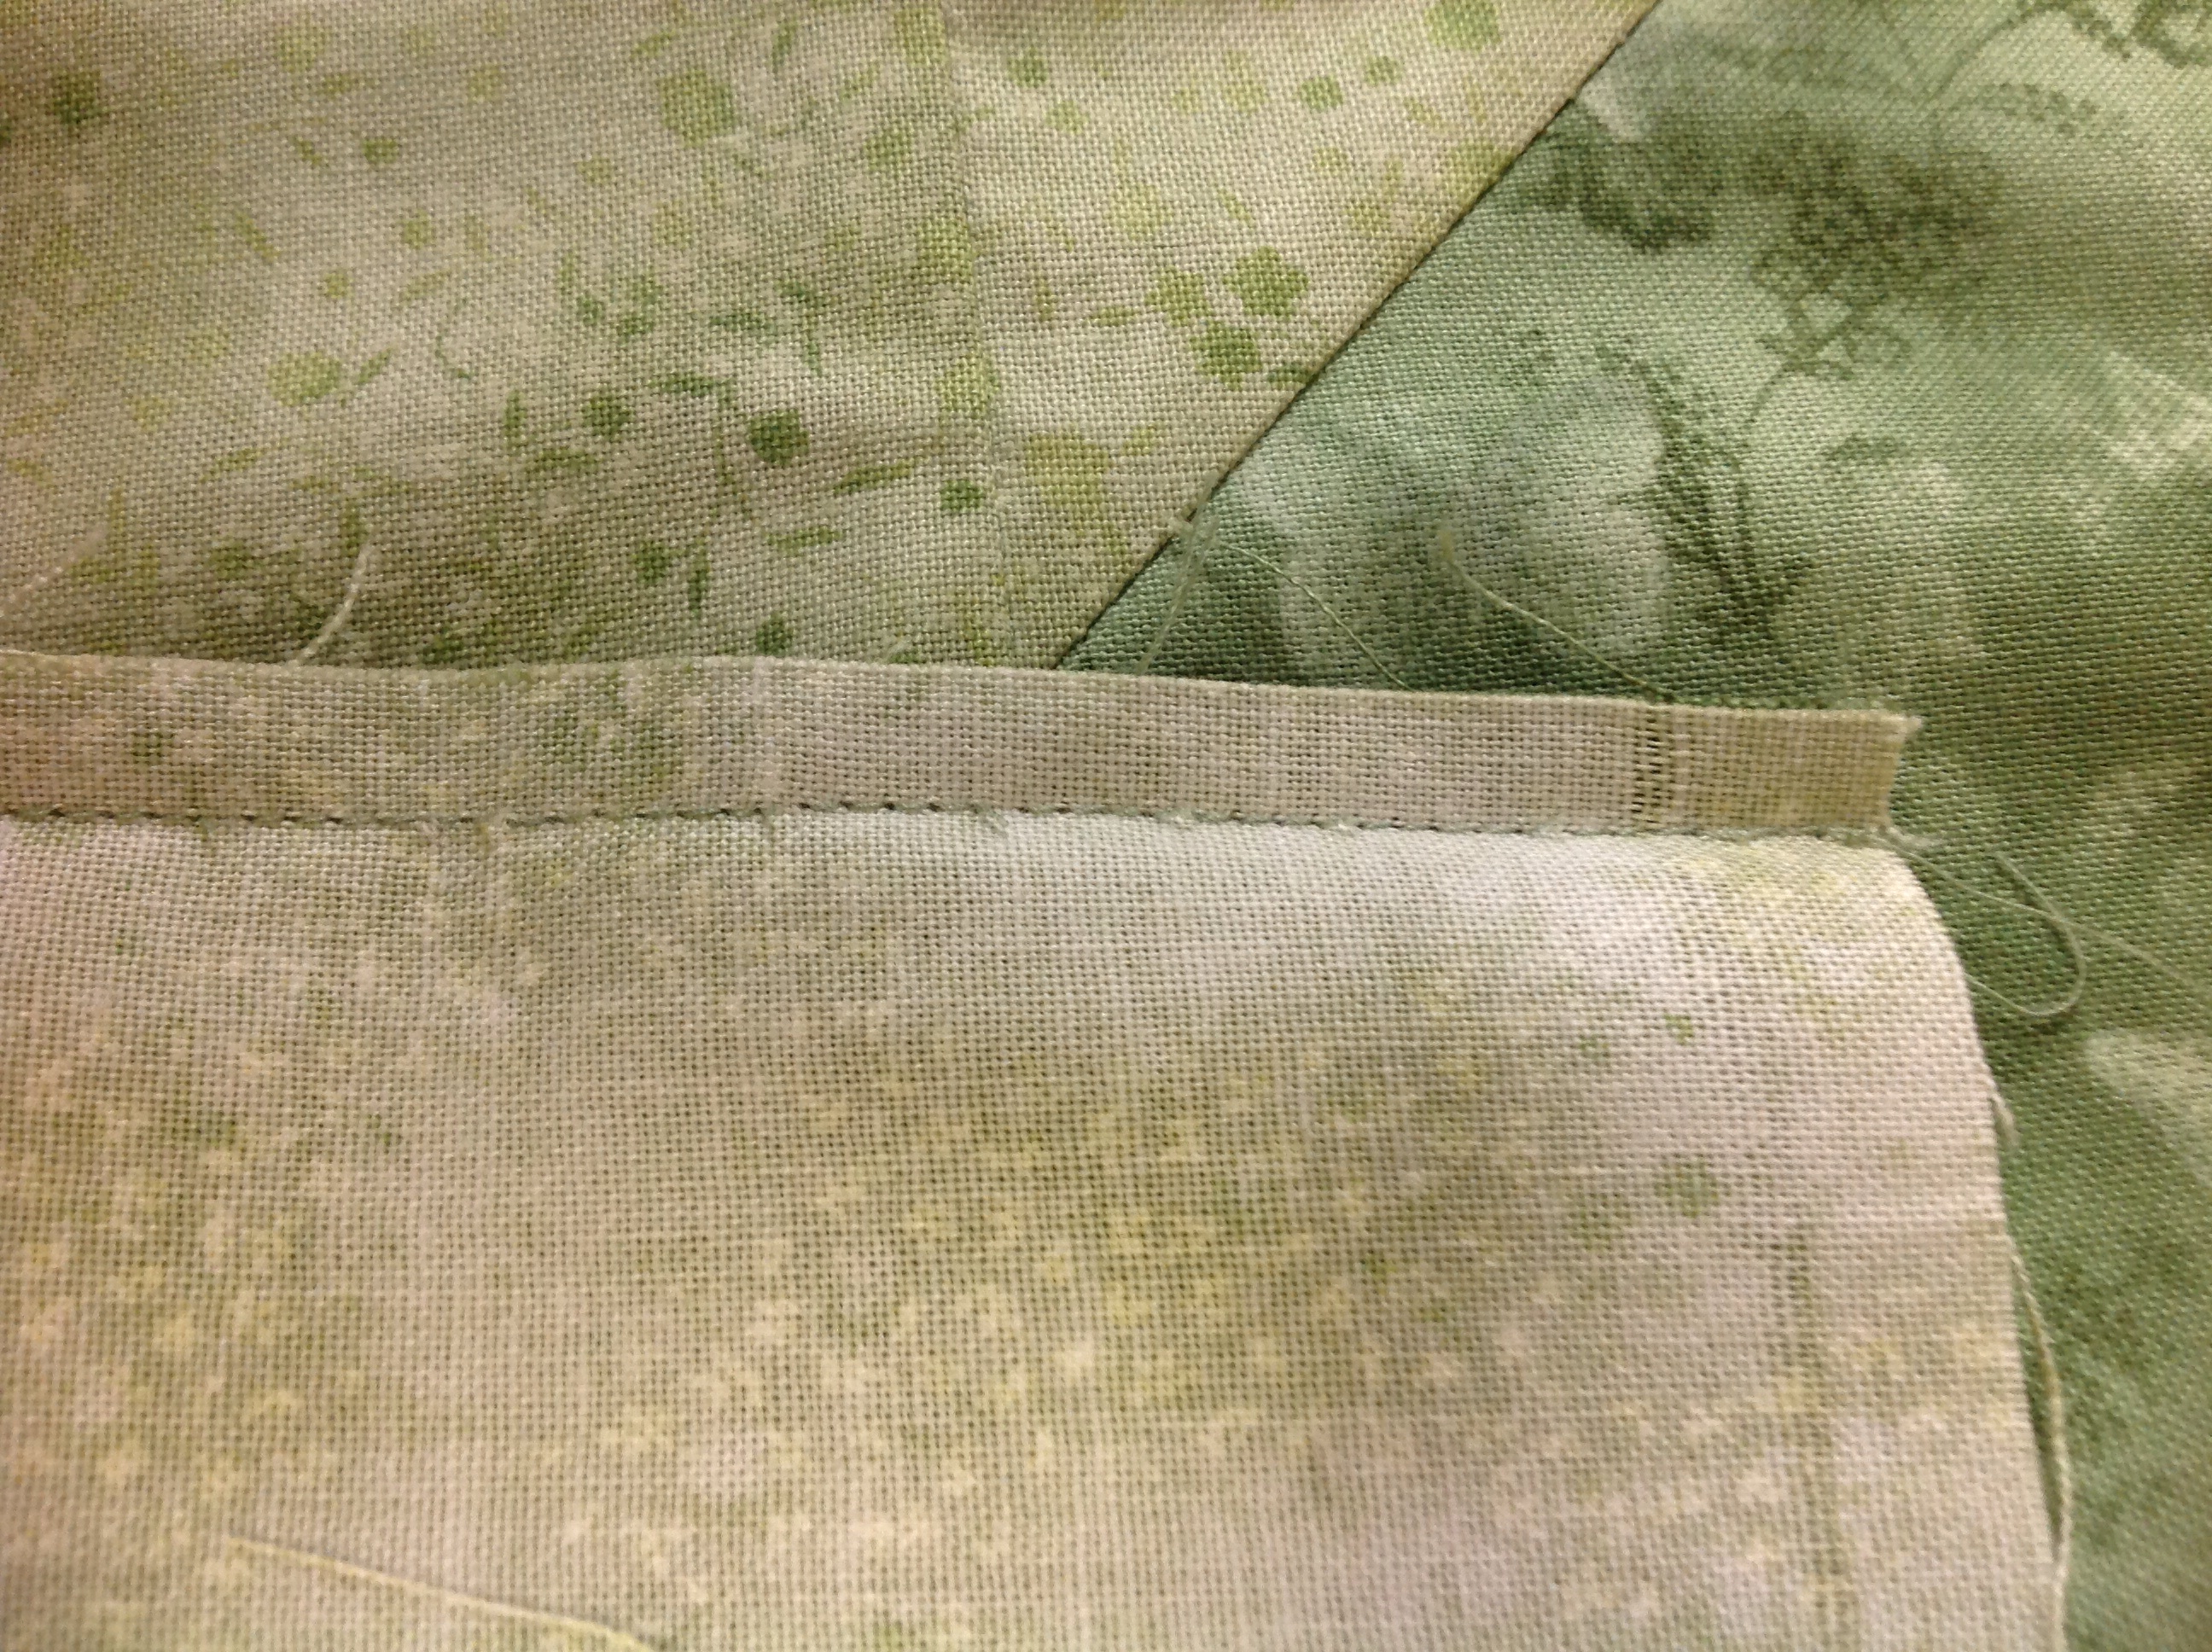
Now keep going along the seam and break around every 4th stitch (in the example above I’ve actually ripped every 7th or 8th stitch but this is a case of do what I say not what I do!)

Now turn the piece over and pull the thread – you should be able to lift it clear with very little force. If it won’t come easily you probably ripped every 8th stitch like me instead of every 4th one like I told you!
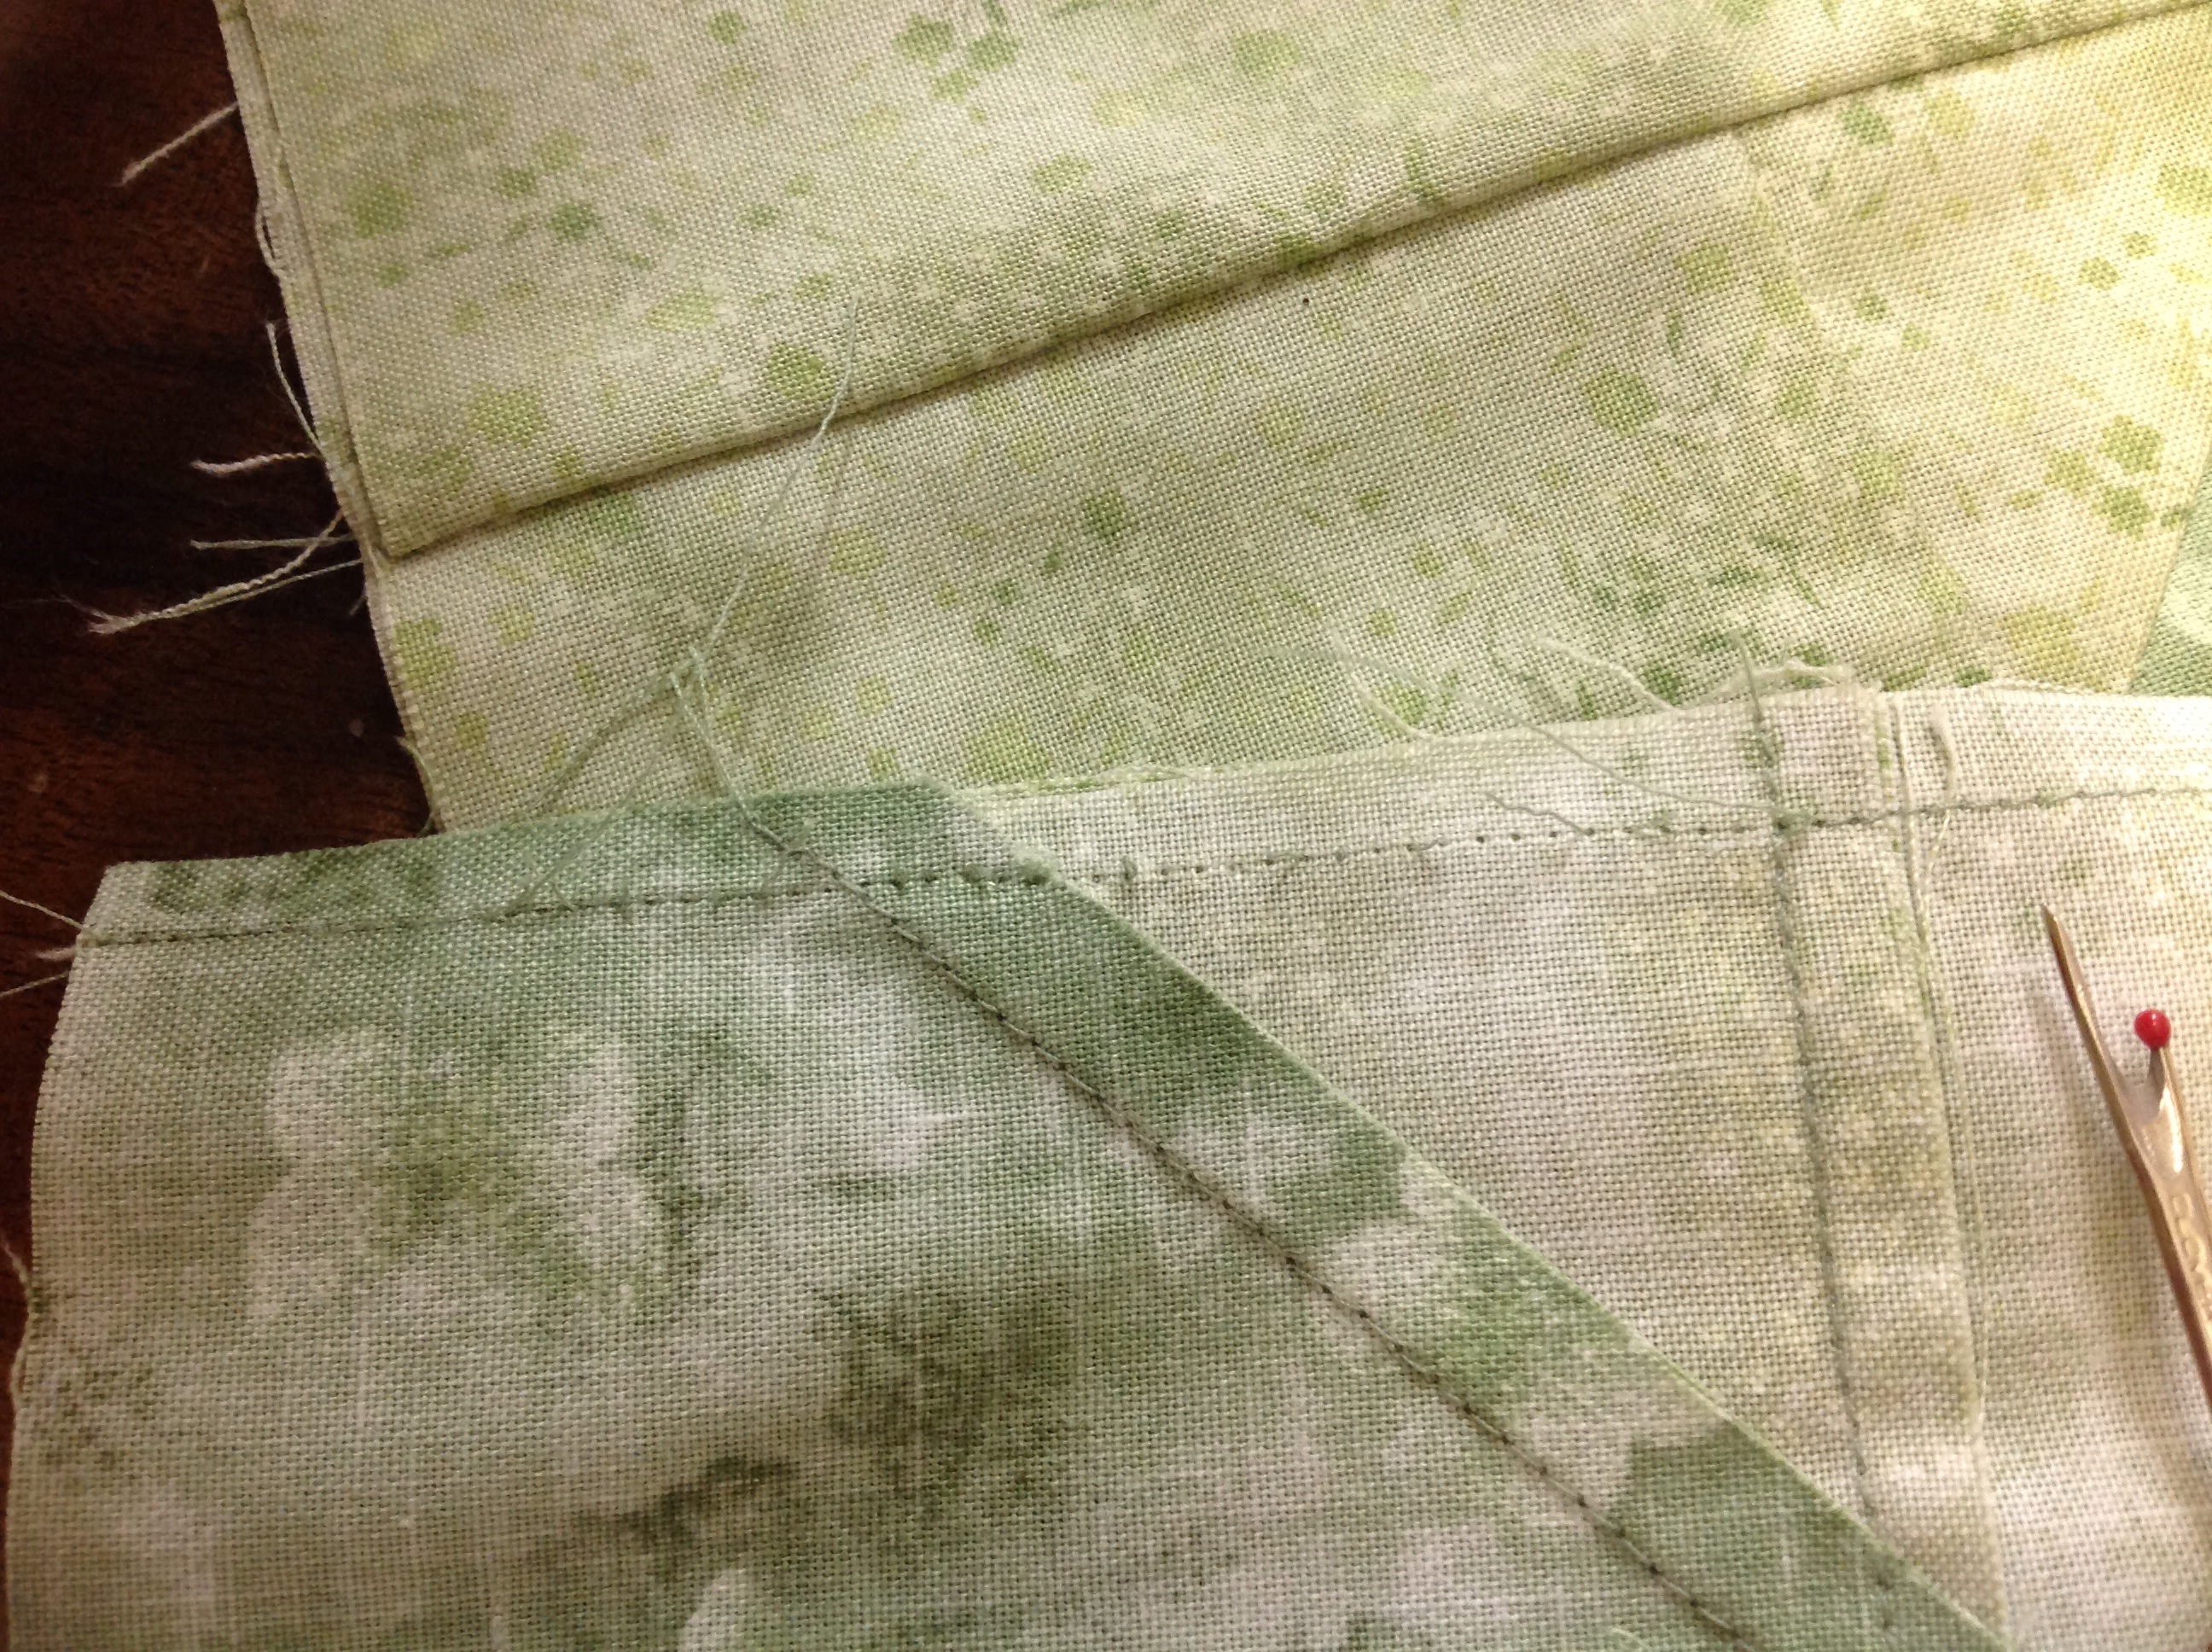
Now turn the piece back over and just brush away the small pieces of thread you have left. Excellent now you can start to sew the seam again – and try to do it right this time!
Oh and one last thing – the teenager-in-residence thinks you should have a link to Eddie in action so here it is:
Until next time
Happy Quilting
Kaye

Ohhhhhhh how true is that. I have several, they hide from me as I overwork them.